Hinges: A Comprehensive Guide to Types, Installation, and Maintenance

I. Introduction
Welcome to our comprehensive guide on hinges! Whether you're a DIY enthusiast or a professional contractor, understanding the different types, installation techniques, and maintenance tips for hinges is crucial. In this article, we will explore the world of hinges, providing you with valuable insights and practical advice to help you make informed decisions for your projects.
II. Understanding Hinges and their history
1. What Are Hinges?
Hinges are mechanical devices that allow rotational movement between two objects, typically enabling the opening and closing of doors, cabinets, gates, and various other structures. They are designed to provide stability, support, and smooth motion while ensuring the security and functionality of movable parts.
2. What is The History of Hinges?
Hinges have been used for thousands of years, with evidence of their existence dating back to ancient civilizations. The early hinges were simple pivots made from wood or metal, serving basic purposes such as attaching doors to door frames or lids to containers. Over time, hinges have evolved, and today they come in a wide array of designs, materials, and functionalities.
III. What are the Types of hinges?
There is a vast range of hinge types available, each with its unique characteristics and applications. Let's explore some of the most common types:
- Butt Hinges
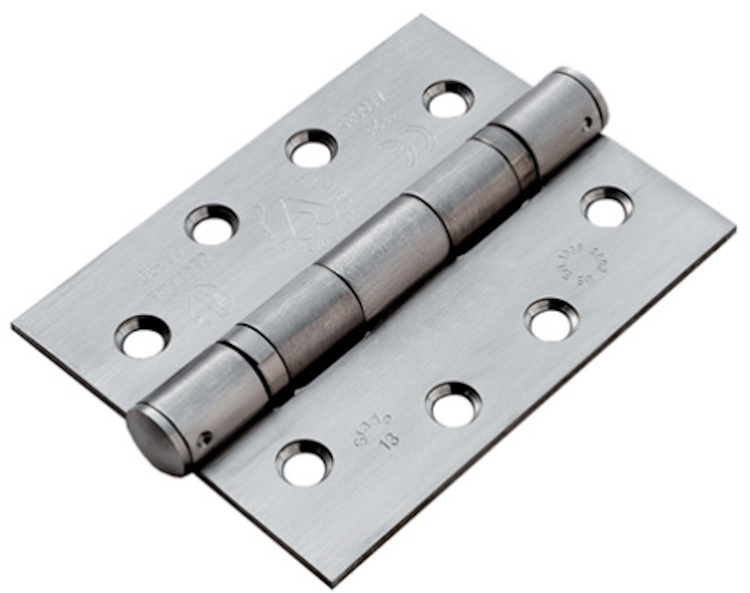
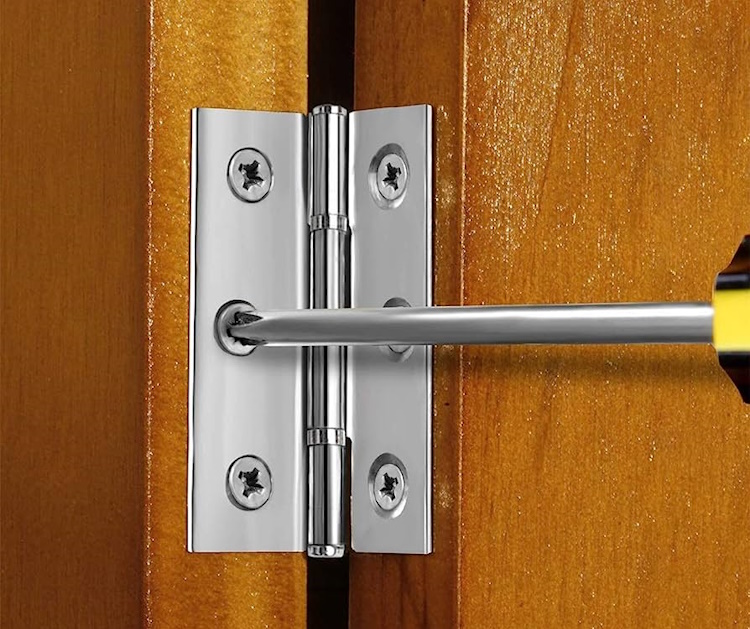
Butt hinges are a type of hinge commonly used in doors, cabinets, and other pieces of furniture. They are typically made of metal and consist of two flat plates, or leaves, joined by a pin or rod at the center. One leaf is attached to the door or cabinet frame, while the other leaf is attached to the door or cabinet itself.
These hinges are designed to provide a smooth pivoting action, allowing the door or cabinet to swing open and close. They are relatively simple in design, with the leaves and pin providing the main components. Butt hinges are available in various sizes and finishes to suit different applications and aesthetic preferences.
- Pivot Hinges
These hinges are designed to provide a smooth pivoting action, allowing the door or cabinet to swing open and close. They are relatively simple in design, with the leaves and pin providing the main components. Butt hinges are available in various sizes and finishes to suit different applications and aesthetic preferences.
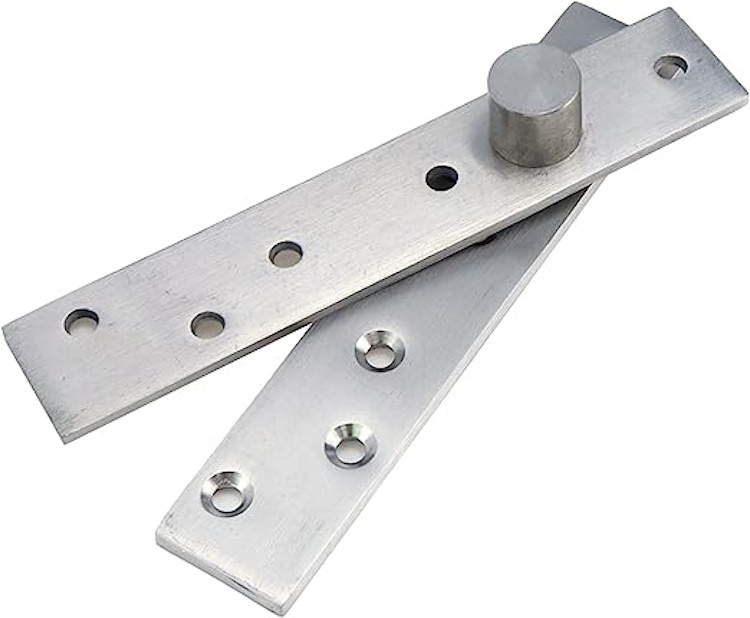
Pivot hinges are commonly used in commercial buildings, such as offices, hotels, and retail spaces, where they can be found on entrance doors, interior doors, and room dividers. They can also be used in residential applications, particularly for high-end or custom-designed doors.
- European Hinges
European hinges, also known as concealed hinges or cup hinges, are a type of hinge commonly used in cabinet doors. They are called European hinges because they originated in Europe and became widely popular in European cabinetry. European hinges are characterized by their hidden or concealed design, which means that they are not visible when the cabinet door is closed. They are typically installed on the inside of the cabinet, attaching the door to the cabinet box. This creates a clean and streamlined look for the cabinets, without any visible hinges from the outside.
One of the key advantages of European hinges is their adjustability. They typically have built-in mechanisms for adjusting the door in three directions: height, depth, and side-to-side alignment. This adjustability makes it easier to achieve a precise fit and alignment of the cabinet doors.
European hinges are widely used in modern kitchen cabinets and furniture, as they offer a sleek and clean appearance. They are often preferred over traditional butt hinges or visible hinges because of their aesthetic appeal and functionality. Additionally, European hinges are generally easy to install and adjust, making them convenient for cabinet makers and homeowners.
- Strap Hinges
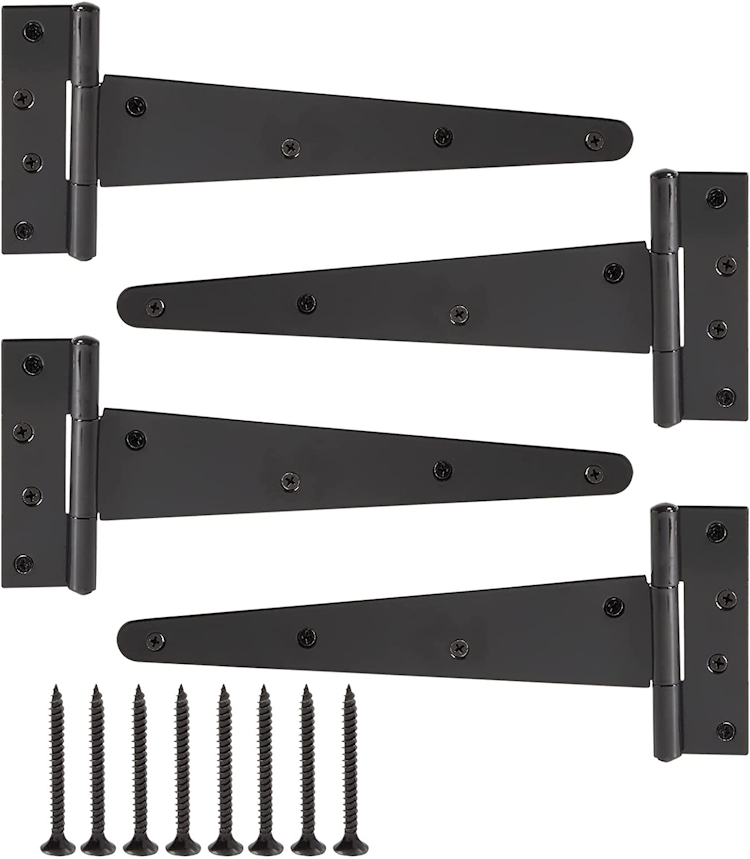
Strap hinges are a type of hinge that consists of a long, flat strap or metal plate with two or more mounting holes on one end and a knuckle or pivot point on the other end. They are one of the oldest types of hinges and have been used for various applications throughout history.
The design of strap hinges allows them to be versatile and suitable for heavy-duty use. They are often used on large and heavy doors, gates, barn doors, garage doors, and other structures where strength and stability are essential. Strap hinges can be made from various materials, including steel, iron, brass, and other metals, depending on the desired durability and aesthetic appearance.
- Adjustable Gate Hinges
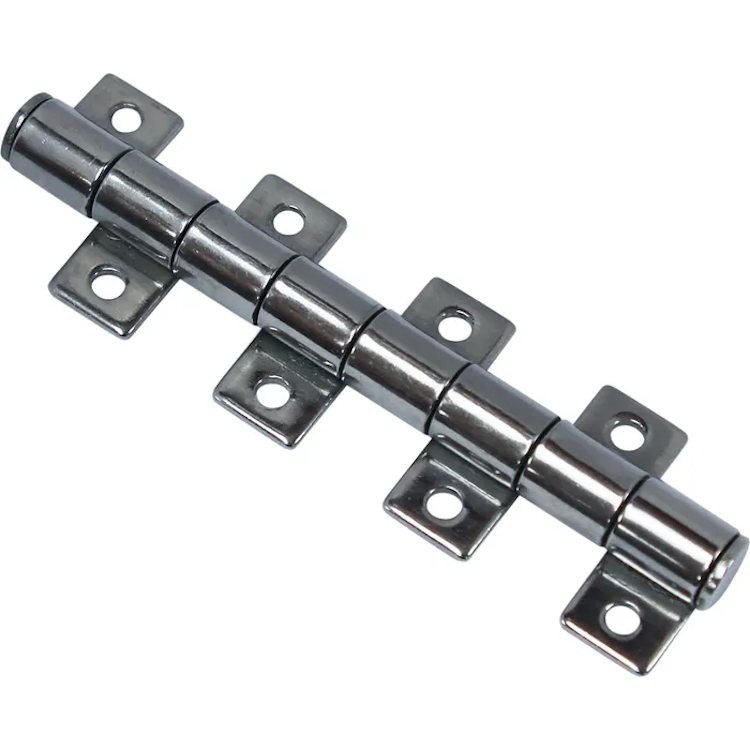
Adjustable gate hinges are a type of hinge specifically designed for gates, offering flexibility and adjustability in terms of gate alignment, swing arc, and leveling. These hinges allow gate owners to make fine adjustments to ensure proper functioning and alignment of the gate, even in situations where the ground or gate frame may be uneven or settling.
The key feature of adjustable gate hinges is their ability to be adjusted in multiple directions. This adjustability is typically achieved through various mechanisms, such as threaded rods, turnbuckles, or built-in adjustment mechanisms within the hinge itself.

- Piano Hinges
Piano hinges, also known as continuous hinges or continuous piano hinges, are a type of hinge that runs the full length of a door, lid, or panel. They are named piano hinges due to their frequent use in piano lids, where they provide continuous support and allow the lid to be opened and closed smoothly.
The main advantage of piano hinges is their strength and durability. They are designed to distribute the weight evenly along the entire length of the hinge, making them suitable for heavy doors, lids, or panels. The continuous design also helps to prevent sagging or misalignment over time.
Piano hinges are versatile and can be used in a variety of applications beyond pianos. They are commonly used in furniture, cabinets, toolboxes, display cases, and other items that require a long, uninterrupted hinge. They provide a clean and streamlined appearance, as they are often recessed or mounted flush with the surfaces they are attached to.
IV. How to Select the Right Hinge?
Choosing the right hinge for your project is essential to ensure optimal performance and longevity. Consider the following factors when selecting hinges:
1. Considerations for Choosing Hinges
- Weight and Load Capacity: Determine the weight of the door or lid and choose hinges that can adequately support it.
- Door Thickness: Match the hinge size to the thickness of the door to ensure proper alignment and function.
- Hinge Finish: Select a finish that complements the overall design and aesthetic of the project.
- Functionality Requirements: Consider factors such as self-closing mechanisms, adjustable tension, or concealed appearances based on the specific application.
2. Determining Load Capacity
To determine the load capacity of a hinge, consider the weight of the door or lid it will support. It is advisable to choose hinges that have a higher load rating than required to ensure durability and longevity.
3. Matching Hinges with Door Thickness
Hinges are available in various sizes to accommodate different door thicknesses. Choose hinges that align with the thickness of the door to maintain a balanced and secure installation.
4. Deciding on Hinge Finish
Hinge finishes come in a variety of options, including stainless steel, brass, nickel, or painted finishes. Consider the overall design scheme and desired aesthetic to select a finish that enhances the appearance of the project.
V. How to Install or Replace Door Hinges?
Installing or replacing door hinges is a relatively straightforward process. Here are the steps to guide you through the installation or replacement of door hinges:
- Gather the necessary tools: You will need a screwdriver (usually a Phillips or flathead, depending on the screws used), a chisel, a hammer, and new hinges if you are replacing existing ones.
- Remove the existing hinges (if applicable): If you are replacing existing hinges, start by removing the screws from the hinge plates on both the door and the door frame using a screwdriver. Carefully lift the door off the hinges and set it aside.
- Prepare the door and frame: If the door is new or the previous hinges left noticeable marks, use a chisel and hammer to remove any recessed areas or wood debris from the mortises (the recessed portions) where the hinges will be installed. Ensure that the mortises are clean and flat for a proper fit.
- Position the hinges: Place the new hinges in their respective mortises on both the door and the frame. Ensure that they are aligned and flush with the edges of the door and frame.
- Mark the screw hole locations: With the hinges positioned correctly, use a pencil or a small nail to mark the locations of the screw holes on the door and frame. This will serve as a guide for drilling pilot holes.
- Drill pilot holes: Using an appropriately sized drill bit, drill pilot holes at the marked locations on both the door and the frame. Make sure the depth of the pilot holes is slightly shorter than the length of the screws to avoid damaging the other side of the door or frame.
- Attach the hinges: Align the screw holes in the hinges with the pilot holes and secure the hinges to the door and frame using screws. Start by partially driving in the screws, then check the alignment of the door before fully tightening the screws. Repeat this process for all hinges.
- Test the door: With the hinges securely attached, test the door by opening and closing it to ensure it swings smoothly and evenly. Make any necessary adjustments to the hinges if the door appears misaligned or if it rubs against the frame.
- Install the door pins (if applicable): If your hinges have removable pins, insert them into the hinges to secure the door. Use a hammer or a screwdriver to tap the pins into place, ensuring they are fully inserted and secure.
- Check for proper alignment and operation: Once the installation is complete, check the door's alignment, swing, and closure. Make any necessary adjustments to ensure proper functioning.
It is important to note that the specific steps and requirements may vary depending on the type and style of the door and hinges being installed or replaced. Always refer to the manufacturer's instructions or seek professional guidance if needed.
VI. Maintaining Hinges
Proper maintenance and lubrication of hinges are essential to ensure their smooth operation, and longevity, and to prevent squeaking or binding. Here are some steps to properly maintain and lubricate hinges:
- Clean the hinges: Begin by removing any dirt, dust, or debris from the hinges. Use a soft cloth or brush to gently clean the hinge surfaces and remove any buildup that may affect their performance.
- Inspect for damage or wear: Check the hinges for any signs of damage, such as cracks, loose screws, or excessive wear. If any issues are found, repair or replace the hinges as necessary before proceeding with lubrication.
- Choose the right lubricant: Select a suitable lubricant for the type of hinge you are working with. Common options include silicone-based lubricants, petroleum-based lubricants, or dry lubricants like graphite powder. Avoid using heavy oils or greases as they can attract dirt and debris over time.
- Apply lubricant to the hinge: Apply a small amount of lubricant to the pivot points and moving parts of the hinge. Use a spray or precision applicator to reach difficult-to-access areas. Be cautious not to over-apply the lubricant as excess oil can drip and create a mess.
- Work the hinge: Open and close the door or move the hinge back and forth several times to distribute the lubricant evenly and work it into the moving parts. This will help to loosen any stiff areas and ensure the lubricant reaches all areas of the hinge.
- Wipe off excess lubricant: After working the hinge, use a clean cloth to wipe off any excess lubricant. This will help prevent buildup and keep the hinge clean. Pay attention to the surrounding areas as well, as lubricant residue may transfer onto adjacent surfaces.
- Test the hinge: Once the lubrication process is complete, test the hinge to ensure smooth and noise-free operation. Open and close the door or move the hinge to confirm that it moves freely and without any resistance or squeaking.
- Regular maintenance: Depending on the frequency of use and environmental conditions, it is advisable to perform routine maintenance and lubrication of hinges every six to twelve months. This will help prevent wear and corrosion, and keep the hinges in optimal working condition.
Remember to always follow the manufacturer's recommendations for lubrication and maintenance, as specific types of hinges may have unique requirements. Additionally, if hinges show signs of significant damage or wear, it may be necessary to consult a professional for repair or replacement.
VII. Conclusion
Hinges play a crucial role in the functionality and aesthetics of doors, cabinets, gates, and various other structures. Understanding the different hinge types, selecting the appropriate hinge for your project, and ensuring proper installation and maintenance will contribute to the longevity and smooth operation of these essential mechanical components.
VIII. Frequently Asked Questions ( FAQs)
1. How do I know which hinge type is suitable for my project?
The choice of hinge type depends on various factors such as the application, door type, weight, and desired appearance. Consider consulting with a professional or researching specific hinge types to find the most suitable option for your project.
2. Can hinges be painted or customized?
Yes, many hinges can be painted or customized to match the design scheme of your project. However, it's essential to follow proper painting techniques and use suitable finishes to ensure the hinges maintain their functionality.
3. Are there any specific maintenance tips for exterior hinges?
Exterior hinges are exposed to the elements, making regular maintenance crucial. Inspect them for rust, lubricate them as needed, and consider using weather-resistant hinges or finishes to enhance their durability.
4. What are the common materials used in hinge construction?
Hinges can be constructed from various materials, including stainless steel, brass, bronze, zinc alloy, or plastic. Each material offers different levels of strength, durability, and aesthetic appeal.
5. Can I replace the hinges myself, or should I hire a professional?
If you have the necessary skills and tools, replacing hinges can be a DIY project. However, for complex installations or if you are unsure about the process, it is advisable to consult a professional to ensure proper hinge installation.

